Fun Post: Crystal Craze Bracelets

We were going to do stamp-making today, but Sophia had an unopened bracelet making kit from her birthday that she wanted to try out, so we did bracelets instead. Piper wanted in on the fun as well. They finished product is cute and hopefully holds up.


img_9482

Sophia’s awesome bracelet!

img_9487

Food: Homemade Swedish Meatballs

Hallå och valkommen! I dag jag laga svenska köttbullar.

Okay, okay, so my Swedish is rusty and I’m still learning (shout out to DuoLingo). I am Swedish-American, but I never learned the language, or the customs, so I’ve taken it upon myself to become more familiar with where my family came from.

I’ve been able to trace my ancestry all the way back to my 5th great-grandparents (around 1822) to Timrå, Sweden– a small municipality on the gulf Bothnia on Sweden’s east coast.
timra-map

My paternal great-grandfather was the first to be born in the U.S. from Swedish immigrants, so we haven’t been here very long which is really interesting to me!

Anyway, I was looking up Swedish cuisine and most of it sounds a little difficult to whip right up, but the Swedish meatballs seemed really easy. And they were– and delicious!

I used this recipe here.

I did replace the ground pork with ground turkey since the market was out of pork, but I feel like they still turned out really well.


Ingredients:
Meatballs:
-2 T olive oil, divided
-1 onion, divided
-1 lb. ground beef
-1 lb. ground pork
-1/2 c. panko
-2 large egg yolks
-1/4 t ground allspice**
-1/4 t ground nutmeg
-Salt and freshly ground black pepper

Gravy:
-1/4 c unsalted butter
-1/3 c all-purpose flour
-4 c beef broth
-3/4 c sour cream
-salt and freshly ground black pepper
-2 T chopped fresh parsley leaves

Directions:
1. Heat 1 T of olive oil in a large skillet over medium heat. Dice onions and add, cooking until translucent, about 2-3 minutes.
2. In a large bowl, combine beef, pork, panko, egg yolks, allspice, nutmeg and cooked onions. Season with salt and pepper (salt och peppar) to taste. Mix well with clean hands and roll the mixture into 1 1/4″-1 1/2″ balls.
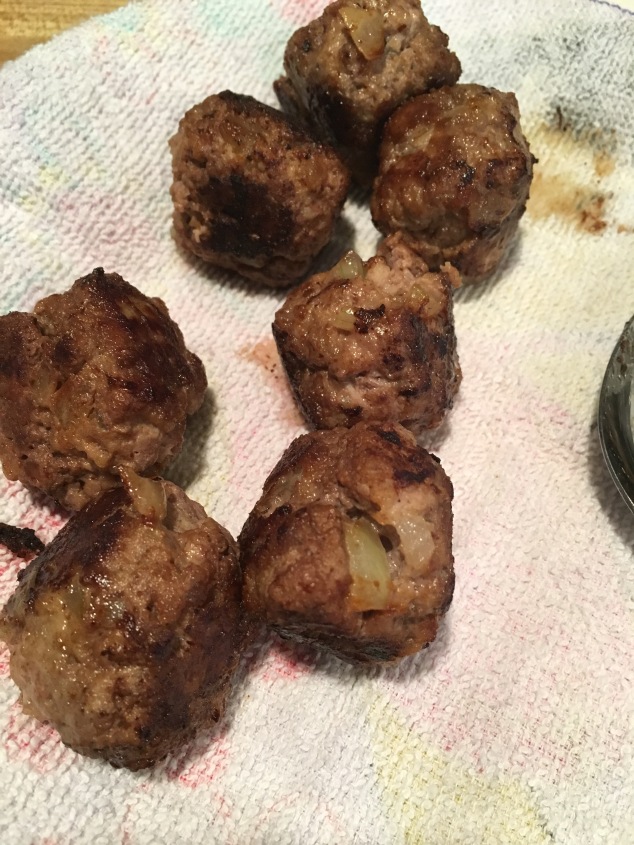
3. Add remaining 1 T olive oil to same skillet, add meatballs in batches and cook until all sides are brown. Transfer to a paper towel-lined plate.
4. To make the gravy, melt butter in same skillet and whisk in flour until lightly browned, about 1 minute.
5. Gradually whisk in beef broth cook, whisking constantly until slightly thickened. Stir in sour cream; season with salt and pepper to taste.
6. Stir meatballs into the gravy in batches, stirring occasionally until heated through and thickened, about 8-10 minutes.
7. Serve with garnished parsley.


**I learned today that allspice does not equal “all the spices.” As someone who prides themselves on cooking and baking, I’m ashamed I didn’t know this. I had a nice little chuckle at myself… as did Matt when I told him.


Here is the end result (I apologize the pictures aren’t glamorous).

img_9269


Science: Water Transportation in Plants

I was really excited about this science experiment, but it didn’t quite turn out how we’d hoped. The idea is that you put a porous vegetable in colored water and that vegetable drinks the colored water and thus turns the color the water is.

The suggestion was to use celery or lettuce. We went with celery because I was able to find them in small packs. Unfortunately, the celery stalks didn’t take up any of the colored water. I cut the end off thinking a fresh cut would open up the vegetable to the water, but that didn’t take as well.

I’ve heard of people doing something similar with white roses and colored water, but I’m not sure if it actually works.

I’ll list the materials and procedure and perhaps someone else will come up with a different outcome.


Materials:
-3 clear plastic cups
-Food coloring
-Celery or lettuce

Method:
-Fill each plastic cup 1/4 way with water.
-Add a couple drops of different colored food coloring in each cup (i.e., one cup has red, one has blue and one has green [or mix some colors to get orange or purple])
-Place a piece of celery or lettuce in each cup.

  1. Explain to your child(ren) to check the cups at 30 and 90 minutes to see what the plants look like.
  2. Have your child(ren) make predictions about what will happen in 30 minutes.
  3. After time has elapsed have the child(ren) check their vegetables to see what happened.
  4. Record predictions and findings in science journal.


This science experiment was created by Rozzy Learning. And honestly, it’s a really cool experiment, I think we just need to try with the lettuce next time. I feel we may get better results.

Here is Sophia’s predictions and the outcome of the celery after two days.

img_9245

Art: Textured Beans

I was really excited to do this project. Perhaps more excited than the kids  Definitely more excited than the kids.

It’s really easy, but we did tweak the project a little. Here is the lesson we used; you can alter it to fit your needs/supplies on hand.

Materials:
-Variety of dried beans (we used a dried 15-bean soup mix found at the grocery store)
-White glue (I didn’t have any, but I did have a glue gun)
-Spray paint (we used acrylic paint)
-Foil
-Ribbon (this is one thing we did not use as I was out)

Optional: We used two partial 2×4’s I found in the garage instead of making ornaments.

Method:
-Using your glue on the foil, make a free-form shape and add your dried beans, making sure to cover all the glue.
-Let dry over night. Then peel off foil and let underside dry.
-Optional to paint with spray paint.
-Tie ribbon around and make loop to create ornament.


Since I found the wood, the girls decided making their names with beans would be fun so they could hand them in their room. Piper absolutely loves painting– doesn’t matter what time it is or what else is going on, that girl will paint until she falls asleep, so she enjoyed this project especially.

All the fun:

Science: Plant Scientist & the Produce-Harvesting Robot

So I got the opportunity to do some demo lessons for Rozzy Learning Company. They’re an educational company that focuses on STEM for young children. Let me tell you something– I’m in love!
Here is their site to sign up and here is a fun link to the book Maggie and the Magnifying Glass which is about a little girl who IS a magnifying glass.

The first lesson we tried was plant scientist. What made it really fun was building a robot. Sophia loves using her imagination (what kid doesn’t, amirite?) and she loves robots. Perfect match.

In this lesson, the student’s objective is to create a prototype of a robot (or robot arm) that can grab fruit and/or vegetables off a tree or bush; a way for the robot to know when the produce is ready to be harvested and a way for the robot to move about the field.

There was a short video about a produce-harvesting robot and then the student had to make their own prototype using recycled art materials.

Here is the video. This was filmed at a Dutch greenhouse in 2014.

Here is Sophia’s robot prototype:

012f05f81a53a3f3f80e0d2fc13639db109444d0c1
Charlie the produce-harvesting robot.

Math: Making 3-D Shapes

I struggled to find engaging math curriculum for Sophia and I typically won’t post about math, but I found these particular few lessons quite neat. It’s all about building 3-D shapes and even I thought it was pretty cool.

I found the print-outs online and they’re pretty self-explanatory in terms of putting them together. Sophia colored them and I glued them together; taping works as well.

Shapes that have yet to be cut out, colored and glued.

img_8852
Sophia’s final work from her cylinder, cube and cone cut-out shapes.

Sophia especially liked drawing 3-D shapes. She practiced drawing 2-D, learning what the two dimensions are. She then learned what the three dimensions in 3-D are. She then practiced drawing 3-D shapes alone and then found out how many things are the 3-D shapes that she made: a cone can be turned upside down and made into an ice cream cone, a cube can be made into a house and cylinder can be a tree trunk. She told me how much she really enjoyed 3-D shapes, so I’m sure she’ll be happy to do more!

UPDATE:
We cut out all the 3-D shapes and Sophia enlisted my help to color one of them. Here’s how they turned out!

018ae9521398808dc08fd7415ac7b88c98ce8bb0ddFrom left to right: tetrahedron, cone, triangular prism, pyramid, cylinder and cube.

Cut-out shapes can be found here

Science: Volcano Mapping, Part 2- South America

Part 2 saw Sophia mapping the volcanoes of South America. One thing she took note of was how all the volcanoes were on the coast and hardly any of them were in-land. This opened up the discussion about the Ring of Fire (pictured below).
ring-of-fire

When all the maps are completed, they form together to create a global volcano map!

South America is full of volcanoes! Especially Chile! Such a beautiful country and rich with tectonic energy!

Chile:

  • Burney 
  • Copahue
  • Mount Hudson
  • Planchón-Peteroa
  • Pular
  • San Pedro
  • Wallatiri

The most recent eruption being on Planchón-Peteroa in 2010. 

Colombia:

  • Nevado del Ruiz

Ecuador:

  • Reventador
  • Wolf (Galápagos)

Reventador erupted in 2014, Wolf in 2015, respectfully. 

Peru:

  • Sabancaya

Costa Rica:

  • Turrialba

0121baa0e00d329d0f3414ad00d9d1242cc843c0fd

Science: Volcano Mapping, Part 1- North America

As a kid, I always found maps to be cool. Apparently Sophia takes after me because SHE LOVED MAPPING! She always has been quite the explorer.

This is part 1 of 4. The other three parts are Asia, Australia and outlying islands and South America. In the end, they’ll all be put together to create one larger map so we can see the bigger picture, so to speak.

For this lesson we used an online lessons from Mystery Science which can be found here. When I signed up, I earned a free membership for a year. Absolutely no credit or debit card required to be on file. Pure, 100% free. So far, it’s been AMAZING. It’s secular, obviously, but it’s also really fun, engaging and easy for the child to understand. It’s broken down by age group and then science field.

This particular lesson we used was called “Could a Volcano Pop Up in Your Backyard?” There were more than just the mapping activity. There was also a video and a volcanoes discovery worksheet. We did skip the worksheet as they didn’t entirely fit in since these lessons are made for actual classrooms with more than one student. But we were able to tailor most of it.

North America has its fair share of volcanoes!

United States:

  • Gareloi Volcano
  • Kilauea
  • Lassen Peak
  • Mammoth Mountain
  • Mount Aniakchak
  • Mount Cleveland
  • Mount Redoubt
  • Mount St. Helens
  • Mount Wrangell

Mammoth Mountain hasn’t erupted since 1400! Kilauea recently erupted in 2015. 

Mexico:

  • Parícutin
  • Popocatepetl
  • Tres Virgines 

Popocatepetl erupted in 2015. 

Guatemala:

  • Pacaya

Pacaya erupted in 2013. 

img_8856

Art: Fall Leaves Part 2

I’m going to be honest with you about this one, it was rather low-key. I thought for some reason this was going to be one of the coolest art projects we did, and I suppose that’s my fault since I was the adult in charge.

Nonetheless, the second part to Sophia’s stroll into fall is very pretty in my opinion and she was quite proud of it.


013d381a2af59cfc57cd1695d5f2bc666d9d4ce60b
The smiley face was her idea and I think it adds a little something. 


In part two, she added water color paint to the original crayon work she did in part one. I really do love the way water color slides off crayon. Makes for a pretty final piece. I don’t see a reason to not always apply water color to crayon!


Art: Fall Leaves Part 1

I love fall (nearly as much as I love winter) so this art project had me really excited! I’ve been home sick from work for two days now and I stepped outside to get some fresh air and the leaves were SO beautiful and I remembered we had this planned so I picked up a few.

This art project is incredibly simple.
Use as many leaves as you and your child would like, in as many shapes and sizes as you’d both like and using plain paper (we just used basic printer paper) and crayons. The colors we used were brick red, goldenrod, mahogany, yellow-orange, black, forest green and burnt orange. I tried to find the “fall-est” colors I could. However, that doesn’t mean you have to use fall colors. You can use any color you’d like!

All you do is draw the leaves and color them in. Yep! That’s it! Now, remember this is only part 1. Part 2 uses watercolor paints, and if you’ve ever mixed crayons and watercolor paints, you know how cool it looks afterwards!

Stay tuned for part two!