Geography: Land Formations 


We live in the Pacific Northwest, so we have a diverse terrain. The Cascade Mountains run through the middle of the state. On one side we’ve got western Washington which includes Bellingham, Seattle and Tacoma; on the other side we’ve got Central and Eastern Washington which encompasses Ellensburg to Spokane (eastern Washington could easily be its own state!). BONUS: We’ve also have a lesser-known mountain range known at the Olympic Mountains. I’ve been there once, it was really pretty!

Sophia recently learned about land formations. And she actually knew most of them until we got down to the isthmus and the delta. We had fun say “isthmus” all night though.

Here are some fun facts about each land type in their largest forms!

Plain: The largest plain is the West Siberian Plain. It takes up 1.2 million square miles. Most of the plain lies within the range of the taiga (the taiga is a favorite forest around our house) and it’s believe some of the deposits date back 65 million years!
west-siberian-plain

Plateau: The largest plateau is the Tibetan Plateau. It extends about 965,000 square miles and is located in a region that is full of mountains and uploads between 13,000-15,000 feet.
tibetan-plateau

Mountain: So for this particular example, I’m cheating a little bit and using Olympus Mons as an example; for a couple reasons. 1) The name Olympus Mons is cool and 2) is the largest mountain in our solar system!
Olympus Mons stands about 85,000 feet above ground, that’s three times as tall as Mount Everest. The incline is so gradual that if going up Olympus Mons, you couldn’t see the top, it would just look flat. The base is 342 miles across. If you were standing at the top of the mountain, you wouldn’t be able to see the base because the mountain curves with Mars.

olympus-mons

(I’m going to skip the hill)

Canyon: The largest canyon in the world is the Yarlung Tsangpo Canyon located in Tibet. It’s 314 miles deep and slightly longer than the Grand Canyon.
tsangpo-canyon

Isthmus: The biggest (narrowest?) isthmus in the world is the Kra Isthmus. It’s located in the Malay Peninsula; the eastern part belongs to Thailand and the west belongs to Myanmar. The narrowest part measures 27 miles.
kra-isthmus

Island: What would you guess the largest island in the world is? I was thinking some tropical island. Well I was wrong. It’s Greenland. Greenland covers about 836,109 square miles. That’s pretty big for an island… Did you know the capital was Nuuk? I didn’t. I need to go read more about Greenland.
greenland

Peninsula: The world’s grandest peninsula. Drum roll please……
The Arabian Peninsula! It’s the largest and longest spanning 3,237,500 square kilometers. The peninsula is divided into four sections: Hejaz, Najd, eastern and southern Arabia. The “fertile crescent” located in Mesopotamia connects the Arabian Peninsula with the rest of mainland Asia.
arabian-peninsula

Delta: I’m not sure if this should go in our land forms project or our bodies of water project… or both. Anyway, the world’s largest delta is the Ganges Delta in Bangladesh and it empties out into the Bay of Bengal.
ganges-delta

Valley: Okay this one was surprising to me. The largest valley in the world is the Atlantic Ocean. Don’t believe me? Look it up! I swear. The length is about 6,000 miles and the width is about 4,000 miles. The depth is a whopping 4.8 miles.
It’s a valley… just covered in water.
atlantic-ocean


Here is the silliest girl in the world, working on land forms. 

img_9906(I have yet to figure out a project yet. It’ll come to me.)

Science: Volcano Mapping, Part 4- Australia and Outlying Islands

Our final installment to volcano mapping! Sort of sad to see it go. I had tons of fun helping Sophia, although a couple times I got, “mom… I got it.”

You know, the post title is somewhat misleading in that there are no actual volcanoes ON Australia. 

There are volcanoes on the outlying islands though. Shall we?

Papua New Guinea:

  • Begana
  • Garbuna Group
  • Manam 

Two of those volcanoes, Begana and Manam, erupted most recently in 2006. 

Indonesia – Java:

  • Egon
  • Merapi 
  • Rinjani
  • Papandayan 
  • Spoutan

Merapi erupted in 2010. 

Indonesia – Sumatra:

  • Kaba
  • Sinabung 

Sinabung erupted in 2014. 

Philippines: 

  • Kanlaon 

New Zealand:

  • Mount Tongariro

Now that we’ve completed our final installment, I present to you the Ring of Fire (you may queue Johnny Cash if you wish).


Science: Volcano Mapping, Part 3- Asia

Facebook has these nifty little memory posts that takes you back however many years you’ve been making memories on their site. 

The other day I was alerted to a status update I’d made a few years ago simply stating, “Russia has volcanoes.”

That information is true, but seemed odd to me at the time. When I think of volcanoes, I think of Hawaii or Japan. However, Russia has 6 volcanoes within the Ring of Fire:

  • Chirinkotan
  • Chirpoi 
  • Kluchevskaya Sopka
  • Koryaksky
  • Korotsky
  • Zhupanovsky

The most recent eruptions being Kluchevskaya Sopka and Zhupanovsky, both in 2015. 

Among the Russian volcanoes, there are volcanoes in Japan:

  • Mount Oso
  • Mount Fuji
  • Mount Meakan
  • Sakura-jima 

The most recent eruption being Sakura-jima in 2013. 

And Taiwan:

  • Guishan Island

Sophia has reiterated her love of mapping, so now I’m on the hunt for more mapping activities. If you know of any, please leave a link in the comments!

Science: Colored Snow

Sophia has been in love with science experiments lately; which is totally fine with me! 

This was a very peculiar science experiemnt. It was a kit from Sick Science. I couldn’t tell you what the “snow” was made of, but it was a type of polymer that you add water to, then you watch it expand! 

Now we have a plastic cup and plastic tube full of this colorful “snow” and not one idea what to do with it. 

Sophia was very interested in how the colors infiltrated into the polymers. She loved how we made purple with the red and blue tabs, green with the blue and yellow tabs and orange with the yellow and red tabs, so this also incorporated her knowledge of the color wheel and we got a little bit of art in there too. 

Food: Homemade Swedish Meatballs

Hallå och valkommen! I dag jag laga svenska köttbullar.

Okay, okay, so my Swedish is rusty and I’m still learning (shout out to DuoLingo). I am Swedish-American, but I never learned the language, or the customs, so I’ve taken it upon myself to become more familiar with where my family came from.

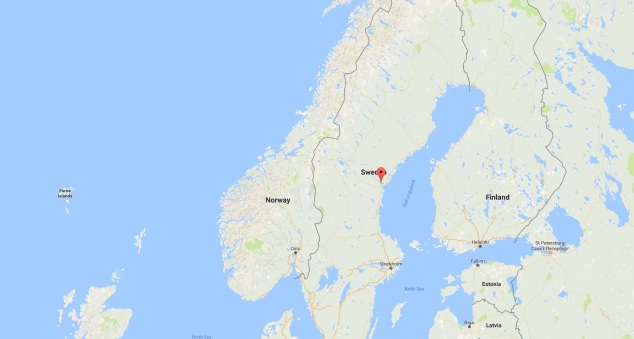
I’ve been able to trace my ancestry all the way back to my 5th great-grandparents (around 1822) to Timrå, Sweden– a small municipality on the gulf Bothnia on Sweden’s east coast.
timra-map

My paternal great-grandfather was the first to be born in the U.S. from Swedish immigrants, so we haven’t been here very long which is really interesting to me!

Anyway, I was looking up Swedish cuisine and most of it sounds a little difficult to whip right up, but the Swedish meatballs seemed really easy. And they were– and delicious!

I used this recipe here.

I did replace the ground pork with ground turkey since the market was out of pork, but I feel like they still turned out really well.


Ingredients:
Meatballs:
-2 T olive oil, divided
-1 onion, divided
-1 lb. ground beef
-1 lb. ground pork
-1/2 c. panko
-2 large egg yolks
-1/4 t ground allspice**
-1/4 t ground nutmeg
-Salt and freshly ground black pepper

Gravy:
-1/4 c unsalted butter
-1/3 c all-purpose flour
-4 c beef broth
-3/4 c sour cream
-salt and freshly ground black pepper
-2 T chopped fresh parsley leaves

Directions:
1. Heat 1 T of olive oil in a large skillet over medium heat. Dice onions and add, cooking until translucent, about 2-3 minutes.
2. In a large bowl, combine beef, pork, panko, egg yolks, allspice, nutmeg and cooked onions. Season with salt and pepper (salt och peppar) to taste. Mix well with clean hands and roll the mixture into 1 1/4″-1 1/2″ balls.
3. Add remaining 1 T olive oil to same skillet, add meatballs in batches and cook until all sides are brown. Transfer to a paper towel-lined plate.
4. To make the gravy, melt butter in same skillet and whisk in flour until lightly browned, about 1 minute.
5. Gradually whisk in beef broth cook, whisking constantly until slightly thickened. Stir in sour cream; season with salt and pepper to taste.
6. Stir meatballs into the gravy in batches, stirring occasionally until heated through and thickened, about 8-10 minutes.
7. Serve with garnished parsley.


**I learned today that allspice does not equal “all the spices.” As someone who prides themselves on cooking and baking, I’m ashamed I didn’t know this. I had a nice little chuckle at myself… as did Matt when I told him.


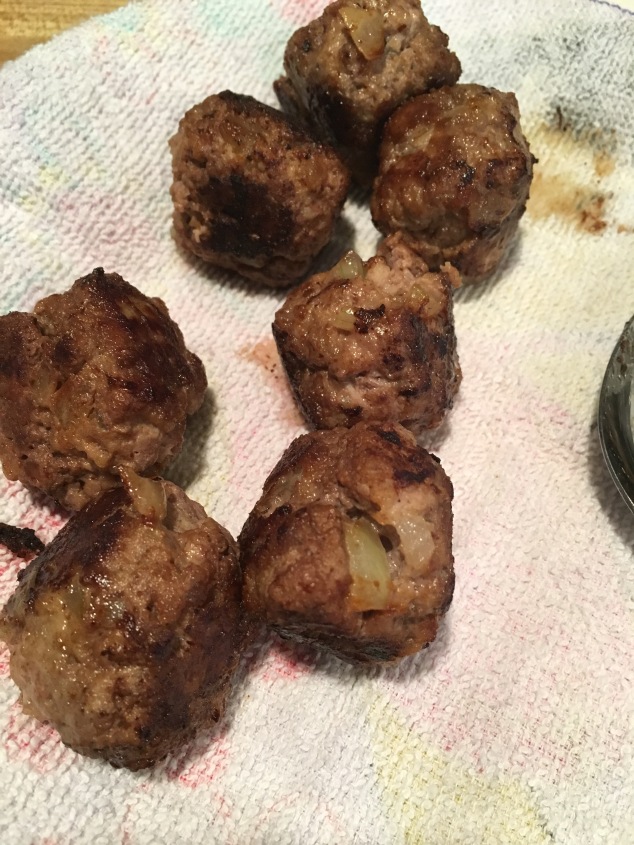
Here is the end result (I apologize the pictures aren’t glamorous).

img_9269


Science: Water Transportation in Plants

I was really excited about this science experiment, but it didn’t quite turn out how we’d hoped. The idea is that you put a porous vegetable in colored water and that vegetable drinks the colored water and thus turns the color the water is.

The suggestion was to use celery or lettuce. We went with celery because I was able to find them in small packs. Unfortunately, the celery stalks didn’t take up any of the colored water. I cut the end off thinking a fresh cut would open up the vegetable to the water, but that didn’t take as well.

I’ve heard of people doing something similar with white roses and colored water, but I’m not sure if it actually works.

I’ll list the materials and procedure and perhaps someone else will come up with a different outcome.


Materials:
-3 clear plastic cups
-Food coloring
-Celery or lettuce

Method:
-Fill each plastic cup 1/4 way with water.
-Add a couple drops of different colored food coloring in each cup (i.e., one cup has red, one has blue and one has green [or mix some colors to get orange or purple])
-Place a piece of celery or lettuce in each cup.

  1. Explain to your child(ren) to check the cups at 30 and 90 minutes to see what the plants look like.
  2. Have your child(ren) make predictions about what will happen in 30 minutes.
  3. After time has elapsed have the child(ren) check their vegetables to see what happened.
  4. Record predictions and findings in science journal.


This science experiment was created by Rozzy Learning. And honestly, it’s a really cool experiment, I think we just need to try with the lettuce next time. I feel we may get better results.

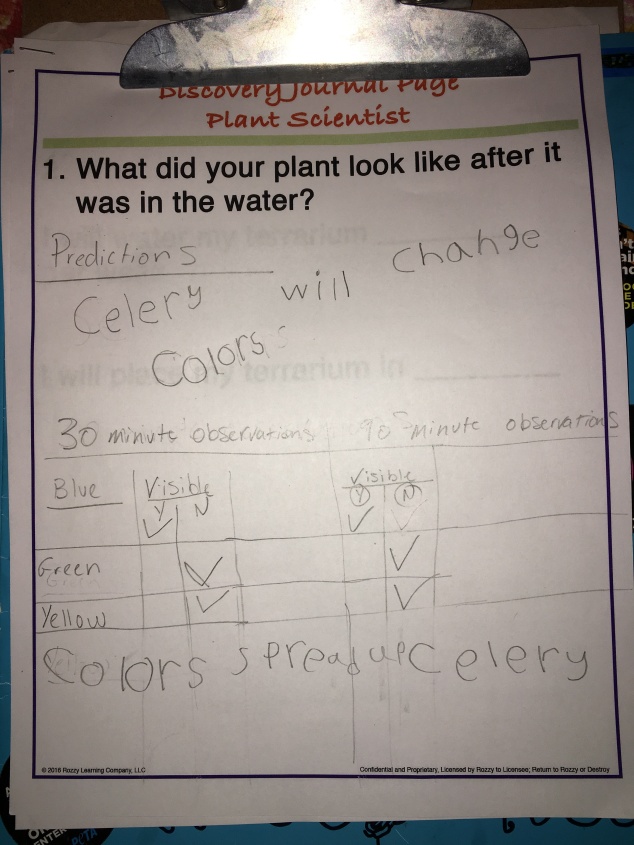
Here is Sophia’s predictions and the outcome of the celery after two days.

img_9245

Art: Textured Beans

I was really excited to do this project. Perhaps more excited than the kids  Definitely more excited than the kids.

It’s really easy, but we did tweak the project a little. Here is the lesson we used; you can alter it to fit your needs/supplies on hand.

Materials:
-Variety of dried beans (we used a dried 15-bean soup mix found at the grocery store)
-White glue (I didn’t have any, but I did have a glue gun)
-Spray paint (we used acrylic paint)
-Foil
-Ribbon (this is one thing we did not use as I was out)

Optional: We used two partial 2×4’s I found in the garage instead of making ornaments.

Method:
-Using your glue on the foil, make a free-form shape and add your dried beans, making sure to cover all the glue.
-Let dry over night. Then peel off foil and let underside dry.
-Optional to paint with spray paint.
-Tie ribbon around and make loop to create ornament.


Since I found the wood, the girls decided making their names with beans would be fun so they could hand them in their room. Piper absolutely loves painting– doesn’t matter what time it is or what else is going on, that girl will paint until she falls asleep, so she enjoyed this project especially.

All the fun:

Science: Plant Scientist & the Produce-Harvesting Robot

So I got the opportunity to do some demo lessons for Rozzy Learning Company. They’re an educational company that focuses on STEM for young children. Let me tell you something– I’m in love!
Here is their site to sign up and here is a fun link to the book Maggie and the Magnifying Glass which is about a little girl who IS a magnifying glass.

The first lesson we tried was plant scientist. What made it really fun was building a robot. Sophia loves using her imagination (what kid doesn’t, amirite?) and she loves robots. Perfect match.

In this lesson, the student’s objective is to create a prototype of a robot (or robot arm) that can grab fruit and/or vegetables off a tree or bush; a way for the robot to know when the produce is ready to be harvested and a way for the robot to move about the field.

There was a short video about a produce-harvesting robot and then the student had to make their own prototype using recycled art materials.

Here is the video. This was filmed at a Dutch greenhouse in 2014.

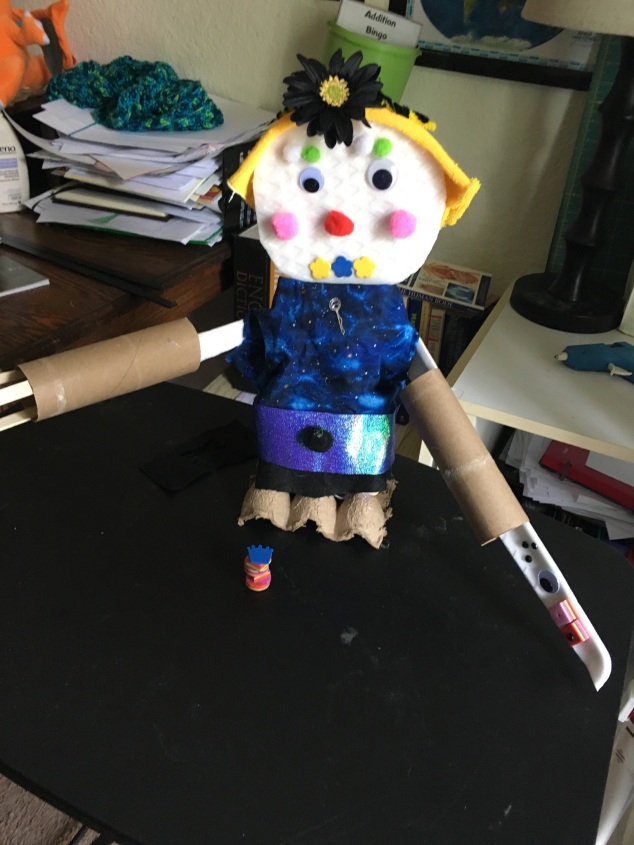
Here is Sophia’s robot prototype:

012f05f81a53a3f3f80e0d2fc13639db109444d0c1
Charlie the produce-harvesting robot.

Math: Making 3-D Shapes

I struggled to find engaging math curriculum for Sophia and I typically won’t post about math, but I found these particular few lessons quite neat. It’s all about building 3-D shapes and even I thought it was pretty cool.

I found the print-outs online and they’re pretty self-explanatory in terms of putting them together. Sophia colored them and I glued them together; taping works as well.

Shapes that have yet to be cut out, colored and glued.

img_8852
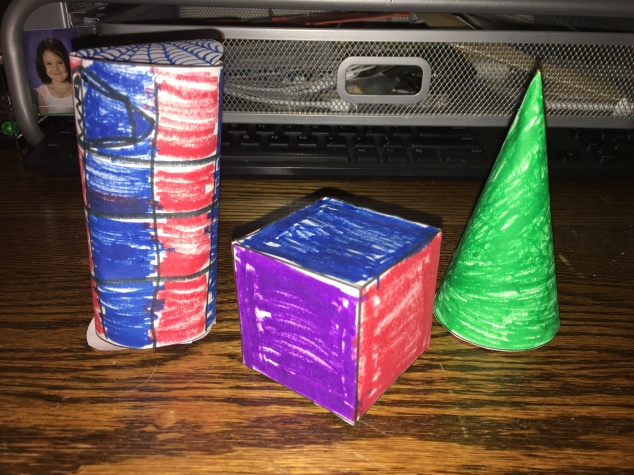
Sophia’s final work from her cylinder, cube and cone cut-out shapes.

Sophia especially liked drawing 3-D shapes. She practiced drawing 2-D, learning what the two dimensions are. She then learned what the three dimensions in 3-D are. She then practiced drawing 3-D shapes alone and then found out how many things are the 3-D shapes that she made: a cone can be turned upside down and made into an ice cream cone, a cube can be made into a house and cylinder can be a tree trunk. She told me how much she really enjoyed 3-D shapes, so I’m sure she’ll be happy to do more!

UPDATE:
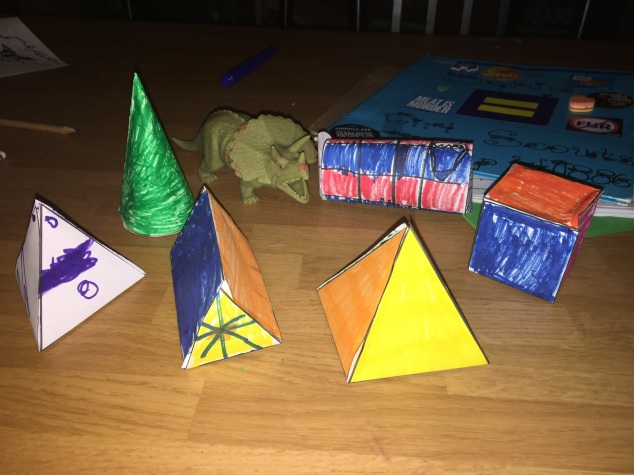
We cut out all the 3-D shapes and Sophia enlisted my help to color one of them. Here’s how they turned out!

018ae9521398808dc08fd7415ac7b88c98ce8bb0ddFrom left to right: tetrahedron, cone, triangular prism, pyramid, cylinder and cube.

Cut-out shapes can be found here